Devil Helmet Quest: Difference between revisions
No edit summary |
No edit summary |
||
| Line 7: | Line 7: | ||
==<span style="font-size:150%;">Spoiler:</span>== | ==<span style="font-size:150%;">Spoiler:</span>== | ||
<span style="font-size:140%;"><b>Requirements:</b></span></br> | <span style="font-size:140%;"><b>Requirements:</b></span></br> | ||
At least two people in the team!</br> | *At least two people in the team!</br> | ||
[[File:Rope. | [[File:Rope.png]] [[Rope]]</br> | ||
[[File:Silver Key. | [[File:Silver Key.png]] The [[Key 3610]] (can be obtained during the quest)</br> | ||
[[File:Destroy Field. | [[File:Destroy Field.png]] [[Destroy Field Rune]]</br> | ||
---- | ---- | ||
| Line 18: | Line 18: | ||
<span style="font-size:140%;"><b>Description:</b></span></br> | <span style="font-size:140%;"><b>Description:</b></span></br> | ||
1). You start your quest from the [[Ancient Temple]] in [[Thais]], descend to the Temple. | |||
[[File:Ancient Temple.PNG]] | [[File:Ancient Temple.PNG]] | ||
*Now we follow the green dash and go lower. | *Now we follow the green dash and go lower. | ||
[[File:-2 Ancient Temple to -3. | [[File:-2 Ancient Temple to -3.png]] | ||
---- | |||
2). Again we go down to a lower level. | |||
*Now we have quite a long way to go. We will pass the following monsters: [[Orc]], [[Poison Spider]] and [[Rotworm]] (on the way there may be a lured [[Fire Devil]]. At the end we go lower to a small cave. | *Now we have quite a long way to go. We will pass the following monsters: [[Orc]], [[Poison Spider]] and [[Rotworm]] (on the way there may be a lured [[Fire Devil]]. At the end we go lower to a small cave. | ||
[[File:A long way and at -5. | [[File:A long way and at -5.png]] | ||
*Go through the cave where there are Poison Fields (they will take us 150 HP at most) and go down once more. | *Go through the cave where there are Poison Fields (they will take us 150 HP at most) and go down once more. | ||
[[File:Cave21. | [[File:Cave21.png]] | ||
---- | |||
3). We follow the green line and go down. Along the way a small Minotaur Respawn. | |||
[[File:A bit far at -7. | [[File:A bit far at -7.png]] | ||
---- | |||
4). After jumping into another hole, we will be attacked by two [[Cyclops]]. We are guided by the map. The letter <b>[K]</b> marks the way to the [[Key 3610]], the letter <b>[Q]</b> is the way to the quest. For now, we will deal with the path to the quest. | |||
[[File:DevilHQ1.png]] | [[File:DevilHQ1.png]] | ||
---- | |||
< | 5). After going down, we follow the only possible way- forward through several levels. This map shows two ways- to the switch (letter <b>[S]</b>) and to the rest of the quest (letter <b>[Q]</b>). | ||
[[File:MCQ2.png]] | |||
---- | |||
6). This time we will deal with the switch, as without it it will be impossible to complete the quest! After going down at <b>[S]</b>, we will see such a view (on the marked field, go up): | |||
[[File:MCQ3.png]] | |||
---- | |||
7). In the room a level up go a few steps south and stand on this switch: | |||
[[File:MCQ4.png]] | |||
---- | |||
8). <span style="color: red;">NOTE!!!</span> it is important that the person stands on the switch until the person doing the quest enters the drain, which will appear in the place marked with the letter <b>[Q]</b> from point 5. | |||
[[File:MCQ5.png]] | |||
---- | |||
0). We jump into the drainage grate and head west. After passing the level gate <b>(level 30)</b>, we climb up the ladder. Going north we will encounter the [[Dragon]].</br><span style="color: red;">Note:</span> I do not recommend falling into any of the three holes - the [[Giant Spider]] lurks there. We will open the door with the aforementioned [[Key 3610]]. | |||
[[File:DevilHQ2.png]] | [[File:DevilHQ2.png]] | ||
---- | |||
10.) Congratulations, here is the final location of this quest! However, in order to get the reward we will have to deal with several minotaurs (2 [[Minotaur Guard]]s, 2 [[Minotaur Archer]]s and [[Minotaur Mage]] - [[File:Great Fireball Rune.png]] [[Great Fireball Rune]]s will be useful).</br><span style="color: red;">Note:</span> that the [[Key 3610]] also opens the door to the [[Giant Spider]], so you have to reckon that the person doing the quest in front of us may have prepared a surprise for us. The rewards can be found in the three marked chests. | |||
[[File:DevilHQ22.png]] | |||
[[Category: Quests]] | |||
[[Category: Quests]] | [[Category: Quests]] | ||
Revision as of 13:22, 22 January 2025
Name: Devil Helmet Quest.
Location: Ancient Temple located near Thais
Reward: Devil Helmet, Halberd, 4 Small Sapphire.
Monsters: Spider, Rotworm, Orc, Orc Spearman, Orc Warrior, Minotaur, Fire Devil, Cyclops, Dragon, Minotaur Guard, Minotaur Archer, Minotaur Mage, Giant Spider.
Spoiler:
Requirements:
- At least two people in the team!
![]() Rope
Rope
File:Silver Key.png The Key 3610 (can be obtained during the quest)
![]() Destroy Field Rune
Destroy Field Rune
Introductory information:
- The quest can be completed once a day. If someone has already done it, you need to wait until the next day to complete it.
Description:
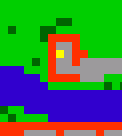
1). You start your quest from the Ancient Temple in Thais, descend to the Temple.
- Now we follow the green dash and go lower.
2). Again we go down to a lower level.
- Now we have quite a long way to go. We will pass the following monsters: Orc, Poison Spider and Rotworm (on the way there may be a lured Fire Devil. At the end we go lower to a small cave.
- Go through the cave where there are Poison Fields (they will take us 150 HP at most) and go down once more.
3). We follow the green line and go down. Along the way a small Minotaur Respawn.
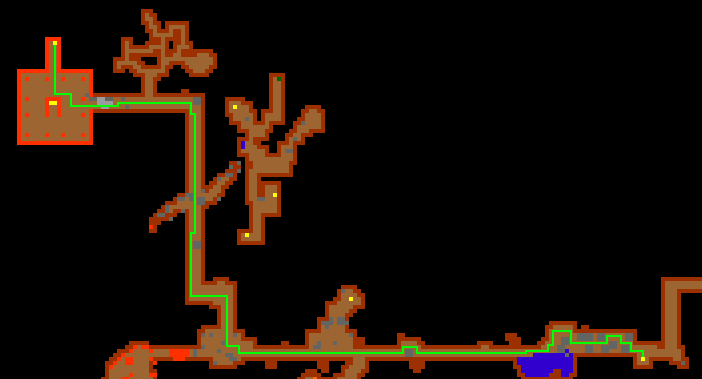
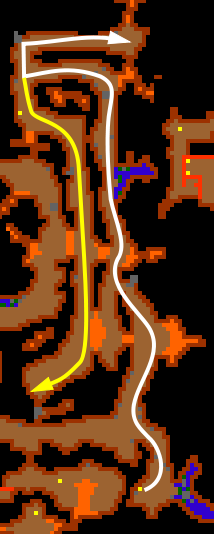
4). After jumping into another hole, we will be attacked by two Cyclops. We are guided by the map. The letter [K] marks the way to the Key 3610, the letter [Q] is the way to the quest. For now, we will deal with the path to the quest.
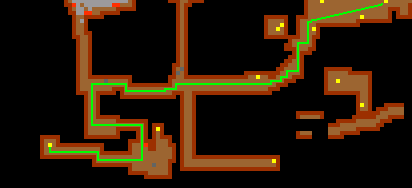
5). After going down, we follow the only possible way- forward through several levels. This map shows two ways- to the switch (letter [S]) and to the rest of the quest (letter [Q]).
6). This time we will deal with the switch, as without it it will be impossible to complete the quest! After going down at [S], we will see such a view (on the marked field, go up):
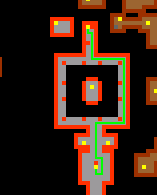
7). In the room a level up go a few steps south and stand on this switch:
8). NOTE!!! it is important that the person stands on the switch until the person doing the quest enters the drain, which will appear in the place marked with the letter [Q] from point 5.
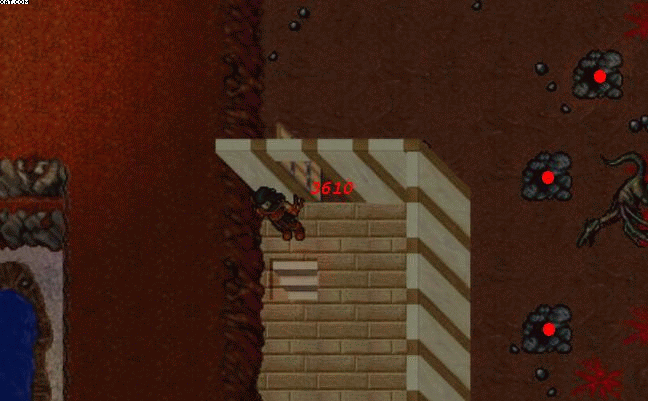
0). We jump into the drainage grate and head west. After passing the level gate (level 30), we climb up the ladder. Going north we will encounter the Dragon.
Note: I do not recommend falling into any of the three holes - the Giant Spider lurks there. We will open the door with the aforementioned Key 3610.
10.) Congratulations, here is the final location of this quest! However, in order to get the reward we will have to deal with several minotaurs (2 Minotaur Guards, 2 Minotaur Archers and Minotaur Mage - File:Great Fireball Rune.png Great Fireball Runes will be useful).
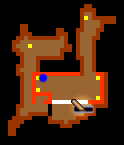
Note: that the Key 3610 also opens the door to the Giant Spider, so you have to reckon that the person doing the quest in front of us may have prepared a surprise for us. The rewards can be found in the three marked chests.
